Usurper's Editart Guide v2.5 Revised: 4-05-2008 Release
2 © RTCM Usurper
|
About Editart |
Getting Editart Running |
The Editart
Interface | Navigating and Saving Tiles
| Creating-Import Ready Images
Tile Facts
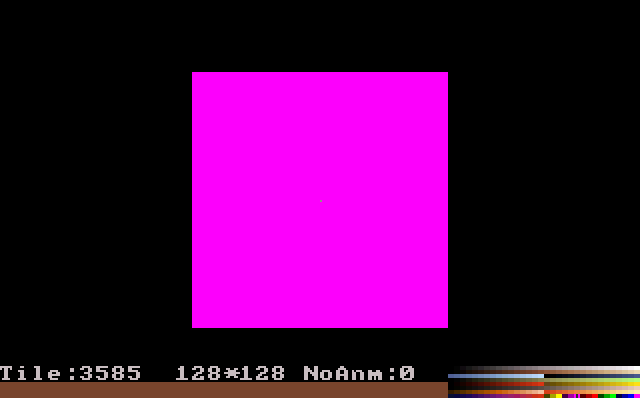
Editart is a program that allows you to modify the art files in games which use Ken Silverman’s Build Engine, such as Duke Nukem 3D, Shadow Warrior, Blood, and others. This guide is written for use with Duke Nukem 3D (hereafter referred to as “Duke3D”), although most of the instructions will apply to other Build Engine games as well. While Editart has some basic drawing capabilities, it is not a fully featured paint program. Its primary purpose is for storing images, not creating them. For that reason, drawing in Editart will not be covered extensively in this guide, save for the explanation of drawing commands in the Keylist section and a few other useful commands. Each art file in Duke3D contains 256 art tiles. There are thousands of art tiles available. If you have Duke3D v1.3d, you will have 4096 tiles (0-4095) available in 16 art files (tiles000.art-tiles015.art). If you have v1.4 or v1.5, you will have 6144 tiles (0-6143) in 24 art files (tiles000.art-tiles023.art). Source ports such as EDuke 2.1 and EDuke32 have raised the limits substantially as well. The art files account for all of the graphics used in the game (textures, sprites, weapons graphics, help screens, fonts, etc.) with the exception of certain cutscenes, which are stored in anm files. Tiles can have dimensions of up to 1024 pixels wide and 512 pixels high. Keep in mind that rotating and wall-aligned sprites, as well as walls, will not shade normally if their height exceeds 256 pixels, and standard (non-parallaxed) floor and ceiling textures will have glitches if their width and/or height meets or exceeds 512 pixels. (This problem is rectified in the Polymost renderer present in JFDuke3D, Duke3Dw, and EDuke32.) All of your art (with a few exceptions such as title screens and cutscenes) will conform to a single 256-color palette.
You should run editart in your Duke3D directory so that you have immediate access to your modified art files in Build and the game itself. The following files should be in the directory along with editart.exe:
You will likely find the dat files already inside your Duke3D folder. If not, they can be extracted from the duke3d.grp file. The art files will almost certainly need to be extracted from duke3d.grp as well. To extract the art or dat files (or both), make sure you have a program called kextract.exe in the Duke3D directory with your Editart files. If it isn’t there, copy it from the Duke3D CD-Rom. Assuming you understand DOS, go to the folder that contains Duke3D. Type kextract duke3d.grp filename.xxxwhere filename.xxx is the file or files you wish to extract. To extract all the art files, replace it with *.art. To extract all the dat files, use *.dat.
Once you have all of the necessary files in the directory, run the Editart program. You should see a black screen with red lettering that reads “Loading Tiles000.art.” 
Note that it is in fact loading all art files that follow tiles000.art in sequential order. If you are lacking an art file, such as tiles004.art, tiles005.art and up may not display correctly. Important: If you extract a file from duke3d.grp using kextract, the program will overwrite any file of the same name in the same directory without prompt or warning. Important: If you have copied files directory off of the Duke3D CD-Rom, they will probably be marked as read-only. You can quickly fix this in DOS by going to your Duke3D folder and typing attrib –r at the DOS prompt. Alternately, you could select all of the files in the folder in Windows, right click on them, select Properties, then uncheck the read-only box and click “apply” and “ok.”
Upon opening Editart you should see the following: 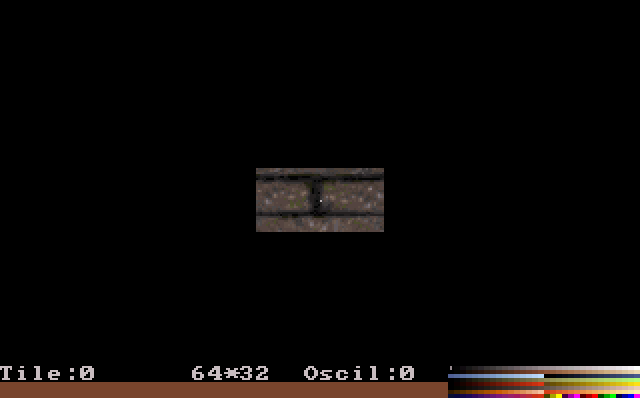
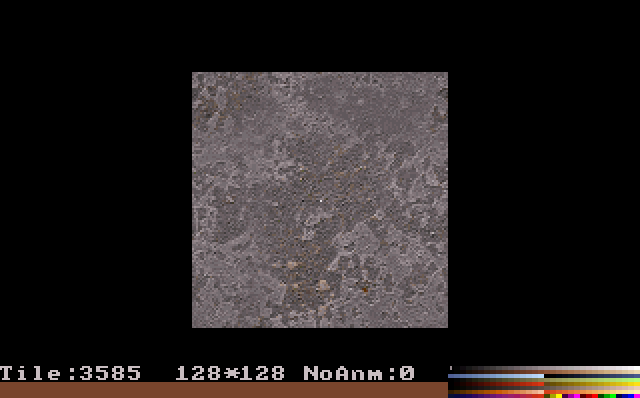
The bottom left corner displays the tile number. If the tile has been assigned a name, that name will appear beneath the tile number. In the center are the tiles dimensions in pixels (64 wide/32 high in the above image) and its animation setting. The bottom right corner displays the palette (the 256 colors that most of the artwork conforms to). The center of the screen displays the tile itself. If you move the mouse or press the arrow keys, you’ll notice a tiny cursor moving around the tile. You can use this tile for drawing pixel-by-pixel or for selecting areas for copying and pasting. The rest of the commands are based on various keys on the keyboard. See the keylist section for a complete listing.
You can save pre-existing tiles to an external pcx file using editart. First, find the tile you wish to save. You can change tiles in three different ways. First, you can press the pageup/pagedown keys to cycle through the tiles one at a time. Secondly, if you know the exact tile number of the file you wish to view, press the G key. This will bring up the goto prompt. 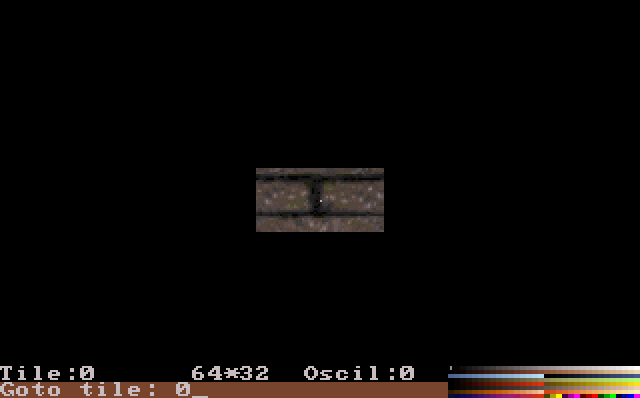
Type in the tile number and press Enter to immediately bring up that tile. The third method allows you to enter a selection mode where you can see numerous tiles at once. Press the V key. Your screen will look similar to the following image: 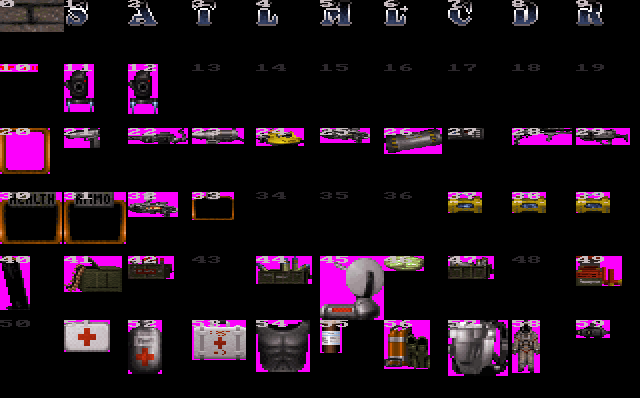
A flashing box surrounds tile 0. You can move this box around using the arrow keys, or scroll up or down rapidly with the pageup/pagedown keys. Once you have selected your tile, press enter to return to the original view mode. Now that you have selected a tile, you can save it to a 256-color pcx file, which can be read by most paint programs. The first tile that you save will be named Capt0000.pcx. Each subsequent tile will add 1 to the number at the end of the tilename. Capt0001.pcx and Capt0002.pcx would be the next files saved, for example. Press either the B or F12 key to save the tile. Important: Editart will only allow you to have 256 compatible image files (bmp, pcx, or gif) in the directory. If the number meets or exceeds 256, it will not allow you to save any more tiles until you’ve cleared some of them out of the Duke3D folder. It will also refuse to display more than 256 tiles in the list of available images for importing. Important: If you have trouble seeing tiles clearly in tile selection mode, you can use the / key on the numeric keypad to decrease the number of tiles displayed. To increase the amount, press the * key on the numeric keypad. There are three settings, the default setting being medium.
Dimensions. If you’ve read through this guide from the beginning, you already know that the maximum tile size is 1024x512 and that rotating sprites, wall-aligned sprites, and wall textures should not exceed 256 pixels in height due to a shading “bug” (or limitation, as it was limited intentionally by the programmer to keep the frame rate high). You should also have read that non-parallaxed floors and ceilings will be glitchy if their width and/or height meets or exceeds 512. If you’re an experienced level creator, you’ve probably also noticed that graphics whose heights are powers of 2 (1, 2, 4, 6, 16, 32, 64, 128, 256, 512, or 1024) tile properly on walls, floors, and ceilings, while those with other height measurements cause glitches when they repeat on a wall or are skewed when applied to floors and ceilings. Generally, a safe practice is to make wall, floor, and ceiling textures have dimensions that are powers of 2. This allows these textues to be used safely on any surface or as any type of sprite. However, wall textures and floor-aligned sprites can break this rule. Wall textures will tile properly with any width, so long as their y dimension is a power of 2. Floor aligned textures will also display correctly at any width as long as their height is a power of 2. Rotating (default) and wall-aligned sprites can be any width and any height up to 256 (unless for some reason they will never be shaded, such as the explosion or fire actors; these could then safely reach the maximum height of 512). Palette Conversion. So now that you have the dimension limits down, you’ll have to worry about the palette. While I provided a zip file with palettes and instructions for use, you may wish to know how to get the default palette yourself. Simply save a tile in Editart, then open the pcx file in your favorite paint program. Most paint programs have an option to save the palette of the current image. If you cannot find this function, check your paint program’s help file. Many paint programs won’t allow you to use all of their features if your image is in 256 color mode. You may wish to increase the color depth to 24 bit and then load the Duke3D palette once you’ve finished editing. If your image contains colors that simply cannot be matched properly in the Duke3D palette, you may be able to use a simple program called Texture Colorizer (available in the RTCM download section) to adjust your colors. Texture Colorizer TutorialTexture Colorizer was developed by Jaimi McEntire at Eldermage Software. It allows you to select any number of colors from a 256-color palette and change all or part of an image's colors to only those colors you've selected. According to the program's readme.txt file, TC uses the luminance values (brightness) of the pixels to determine which of the selected colors to match it to. The program works with bitmap files only (bmp), so you will need to convert the image you wish to modify. The palette is read from a second bitmap. For your convenience, I've prepared one for you here, along with a sample image. The next section will guide you through "colorizing" the sample image.
Special Palette Colors and Transparency Issues: A common problem when converting images to the Duke3D palette, even if they appear to convert properly, is the existance of fullbright colors in the image. Fullbright colors are indexed as colors 240-254 in the palette, and are located in the last row of the palette when viewed in Editart and most paint programs. These colors do not get shaded in the game. An example of fullbrights can be seen in the eyes of the Pigcop. You can see during the game that his eyes never darken, no matter how dark the rest of the sprite appears. Fullbrights can be useful for making permanently lit objects, but they can also be bothersome when converting images to the Duke3D palette. The zip file of palettes I provided includes one that replaces the fullbrights with a single unique color similar in shade to the transparency color, making it easy to spot. Transparency is determined by the last color (color 255) on the default palette. This purple color happens to share the same properties as one of the fullbright colors; that is, it contains the same amount of red, green, and blue values as color 245. If you don't use a modified palette when saving a file with transparency in your paint program, the program will likely map the transparent color to 245 instead of 255. Using the modified palette will cause the transparent color to be mapped to color 255. If you've already imported your image and find that the transparent color is incorrectly mapped, you can quickly fix this problem. Hitting the backspace key to select the transparent color. Now move the cursor over the part of the image that's supposed to be transparent. Hit the C key to automatically change all instances of the highlighted color to the transparent color. File Types. Non-interlaced .gif files are recommended for importing into Editart. Editart can also import 8-bit .bmp and .pcx files if their dimensions are 300x200. It seems to have no trouble with .pcx files of any size that were previously saved by Editart. Recommendations
This section assumes you are aware of the following:
Find the tile you wish to import your image to. Set the size of the tile to the dimensions of the image by pressing the S key. First type the width (x dimension) and press enter. Then do the same for height (y dimension). 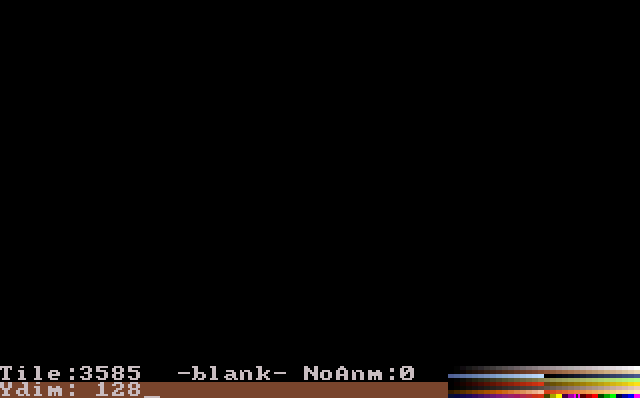
Press U to begin importing. This will bring up a directory listing. Files that can be imported will be highlighted. Select .. to move up to the parent folder and look for the image in another folder. Press escape to cancel. 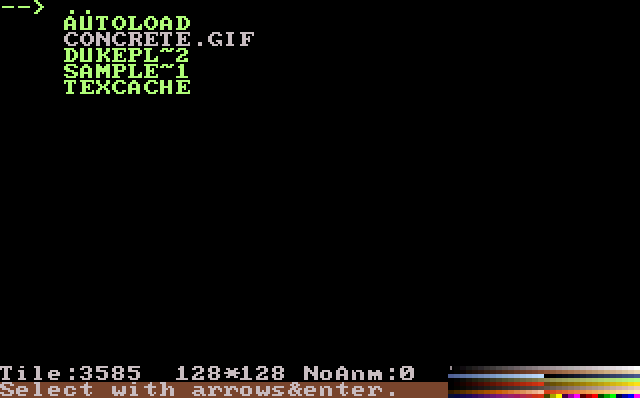
You should see the image along with a flickering border. The border represents the dimensions you set for the image. If the box is the size of or larger than the image, it will surround the edges of the image perfectly. If the image is larger than the dimensions specified, then it will be cropped to the border. 
If your tile has a height larger than 200, you may get smeared pixels in your tile. The solution is to move the cursor to the top row of pixels prior to importing the image. The program imports the tile from the top row of the image, but apparently if that top row is off the screen, it takes the topmost row that is onscreen. Sometimes, Editart will cut tall images off at the 256 pixel mark. This is most noticable when importing new sky textures. Using Editart's native copy and paste commands, you can get around this problem with a little extra work. First, import the top half of your image. Then find an empty tile and import the bottom half. Now you must copy the bottom half of the image. Move your cursor to the top-left corner and press 1. This defines the top-left corner of the selection you wish to manipulate. Move the cursor to the bottom right corner and press 2. This defines the bottom-right corner of the selection you wish to manipulate. Now press 3 to copy the selection. This functions in a like manner to the Windows clipboard, save that the image is not stored in memory after you leave editart and is not available to other programs. Now [continued]
NoAnm (no animation) is the default setting for tiles. There are three types of animation you can apply to tiles:
LimitationsBefore you begin animating tiles, there are some limitations you should be aware of:
Setting the tiles to animateAssuming you want to animate forward or oscillate, go to the first frame of the animation and press the - key. This will change the animation setting from NoAnm to Oscil to AnmFD to AnmBK. Press - until you've selected Oscil or AnmFD and then press the + key. The + key changes the number next to the animation type, which indicates how many frames AFTER the first frame there are in the animation. If you have five frames of animation counting the first one, the animation number should be 4. Now press A to animate it. Select Y to save it when prompted, then use the + and - keys to increase or decrease the speed of the animation. When you have found the desired speed, press Enter. Save it when you exit or select another tile and your animation is complete. The steps for AnmBK are the same, except that you select the last frame in the animation.
Replacing the art for the weapon the player is carrying can present challenges. While modern ports of Duke3D allow you to change the offset of the weapons in the con files, those who wish to simply modify the appearance of the original weapons or who are editing another Build Engine game will have to adjust the weapon alignment in Editart. After you've replaced a frame of weapon art, press the ~ or ` key (above the Tab key and next to the 1/! key). A white cross should appear in the center of the screen. You can move the image around with the mouse and arrow keys, using the cross as a way of judging how much you've changed the alignment of the tile. If you select the pistol sprite and move its alignment down, less of it will be visible in the game. Each weapon has a different alignment, and you'll likely have to play-test it a few times before getting your new weapon art aligned properly. Note also that each successive frame must be aligned with the previous one, or the animation will be off. Be aware of quirks in the way some of the original weapons are programmed. They may use overlapping art rather than a standard string of animating frames. Note also that there is an unused frame of animation that may be utilized in the Duke3D RPG.
Enemies and other sprites can be made to appear 3D in the Build Engine by assigning different sprites to them when when they are viewed from different angles. When you import 3D actors, you'll want to import the frames in a specific order. You'll have to place the frames in order not only of animation, but of sides. The first frame of each part of the enemies action (standing, walking, jumping, shooting, etc.) should be the frame that has the enemy facing you. The second frame should be the same pose, but facing more to the left of the screen. There are four kinds of 3D actors, and they are named based on the "angles" value they use in the Duke3D con files:
Like weapon editing, enemy-importation sometimes requires adjusting the character's alignment. All images are centered automatically when imported, but sometimes this isn't always wanted. If you look at the Commander, you'll find he is not centered. By moving his alignment above the centerline, it gives the Commander the appearance of hovering in the game. It also seems that when an enemy shoots or spawns another sprite, the point of origin of the projectile or spawned sprite is the center-point (where the white cross's center is on the sprite in Editart).
Skies cannot be resized like other ceiling tiles. They follow a strict size and repeat order, and their total width always comes out to 1024. Unfortunately, Duke3D does not allow you to make skies from a single 1024 pixel-wide image. Nor will it accept skies that are 512 pixels wide. Since the sky tile must repeat and come out to 1024 pixels, its width should be a power of 2 up to 256 (1, 2, 4, 8, 16, 32, 64, 128, or 256). With sky heights, 400 is a common number among the default skies, and should work fine in all cases. (Though it may not appear to tile properly in Build/Mapster32, it will work inside the game itself.) Duke3D uses multiple frames for some of its skies. These "panoramic skies" are made up of several images of 128 pixels in width. Panoramic skies do not simply repeat in the order they appear in Editart. Each panoramic sky has its own unique repeat pattern. You can make your own panoramic skies without having to replace the originals. You will have to mimic the repeat patterns of one of the original panoramic skies, however.
Clockwise, the sky patterns are:
In order to make the new sky image work properly in your maps, you must first finish constructing the map. Place the first tile of your panoramic sky on all the areas where you wish the panoramic sky to appear, and parallax them. Now add one final sector to the map. In this sector, place the image of the sky you based your sky-pattern off of (LA Sky, Bigorbit, or Moonsky) on the ceiling and parallax it. Save your map. The game will force all of your skies to behave in the same way as the sky in the last sector placed in the map.
This is the list of Editart keys and their functions from the Build Docs. The Build Docs were written by Allen H. Blum III and Richard "Levelord" Gray, with additional documentation by Kenneth Silverman. My comments are in brackets.
Extra features: (if you actually want to do the artwork in EDITART or if you want to touch-up some imported art.)
If you want to build your own version of Editart, download and install OpenWatcom, the open source version of the compiler originally used to compile Editart. Make sure you install support for DOS applications. Open up the program's IDE and click on File, then New Project. Give your project a name. Set the target environment to DOS - 32-bit and select DOS/4GW Executable as the Image Type. Click OK. In the project window that appears, right click and select New Source. Find your local copy of EDITART.C and add it to the project. Highlight EDITART.C and find the button labeled "Make the selected source file" (the button label appears in the status bar when you move your cursor over it) and click on it. An .obj file is generated from this. Now click the button labeled "Make the current target" to generate an .exe from the .obj file. The IDE generates several warnings when making the source file. This is normal. If you get errors, then the program will not compile. You will require DOS4GW.EXE in order to run your custom Editart program. Simply install it in the same folder with your custom Editart.
Usurper wishes to thank everyone who has supplied information for this document and encouraged its growth over the years:
|